modeller | Instructions
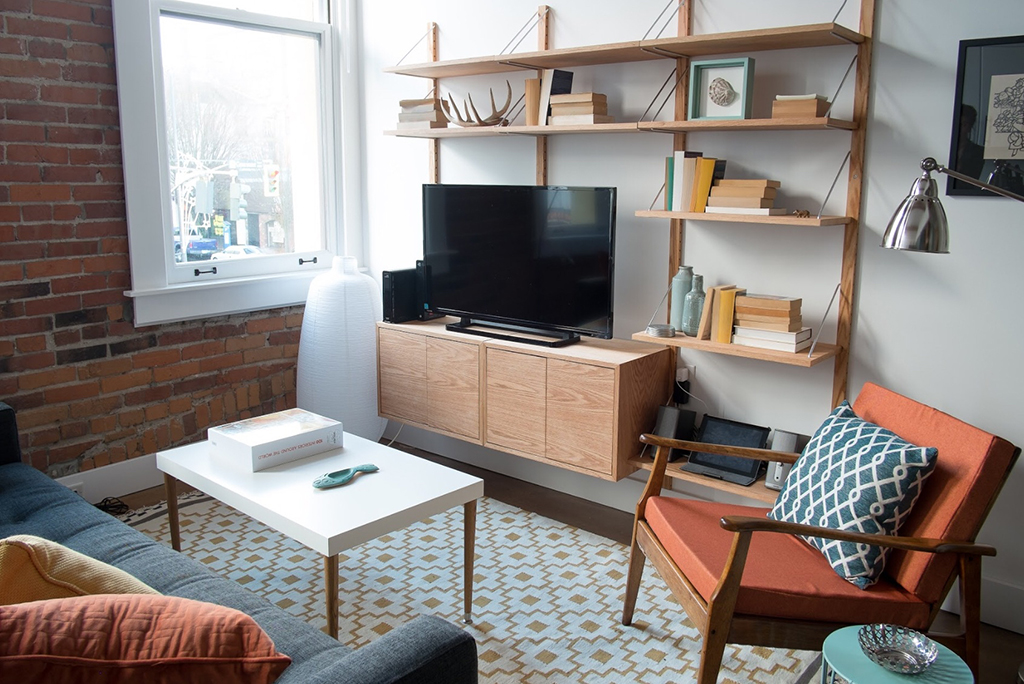
The modeller system inspired by mid-century modern designers like Poul Cadovius's Royal System and the Vitsoe 606 Universal shelving, the Modeller system is an updated tribute to these classic designs. Using the latest hardware and technology to make a system that better fits today's needs with more versatility, features & options while maintaining handmade heirloom quality with a free professional design service to help configure your system.
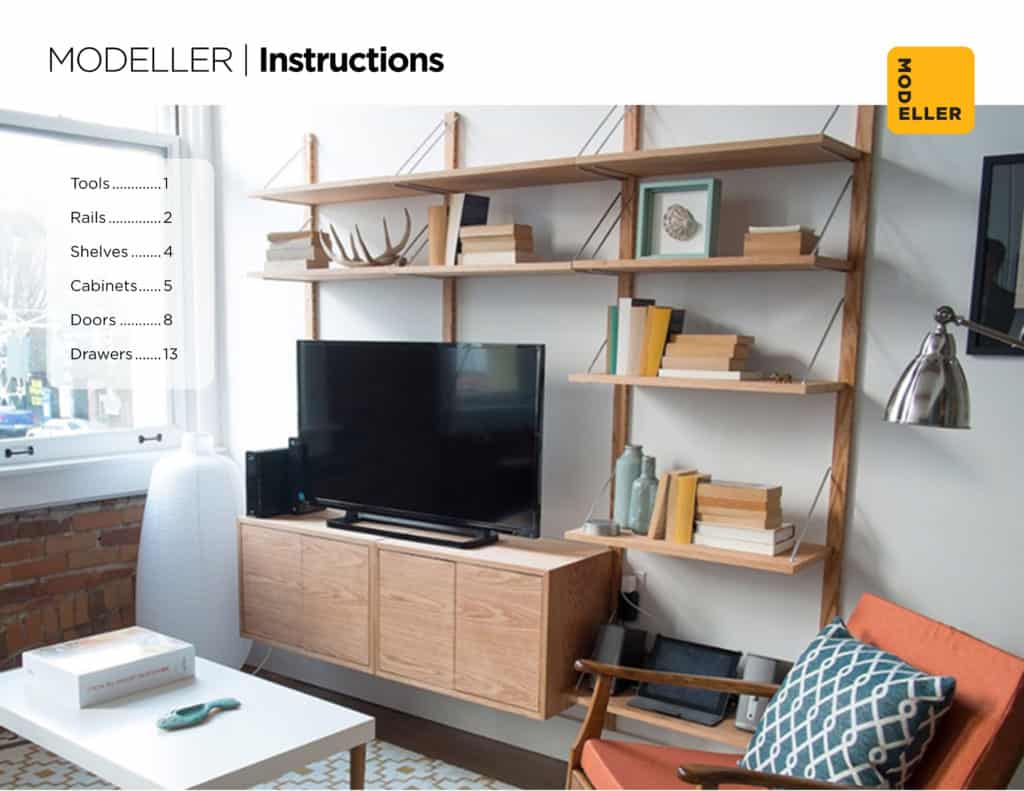
Instructions PDF
Here is the PDF version of our complete instructions for the assembly and installation of your modeller system. It contains all the same information as you will find tabed instructions below
Tools
- Drill
- PH2 Philips Screwdriver
- PZ2 Pozidriv Screwdriver>
- T-10 Torx Screw driver or bit
- Spirit Level
- 4mm hex wrench
- Pencil
- Tape Measure

Rails
Step 1. Wall Studs
Mark both sides of each 1½” stud location within the wall (usually 16” apart; mark each second stud for a 32” wide system setup). Using a strong neodymium magnet works well. It will stick to the dray wall screw heads. 2” GRK small head finishing screws are provided for wood studs. Installing support rails over wall studs makes for an easier and more robust installation, but it is not essential. Rails can be installed anywhere; when using the proper anchors, select the correct anchors for any holes that don’t hit a stud.


Shelves
Step 1. Shelf supports
Make sure you have a pair of right and left-shelf support rods. Start with the shorter part of the arm; align it parallel to the side of the shelf. Next, insert the bottom hook from the top, turn it 90° and slide the short part down into the hole. Before reaching the bend, turn the arm back parallel with the shelf side, then lift the support as you rotate to put it in its final position.

Step 2. Shelf hanging
Pick up the shelf from the short edges so you can touch the supports underneath with your fingers. Hold the shelf at forty-five degrees to see the bottom hooks at the back. Insert the lower hooks first one at a time, then lift the shelf front until level. Next, insert the top hooks one at a time. If necessary, use a mallet to tap the bracket hooks lightly to set them entirely in the hole.

Cabinets
Step 1. Cabinet support
Lay a blanket or towel on a table to protect the panel, then place the cabinet top panel flat with the inside facing up. Next, screw in both angled support brackets at the back.
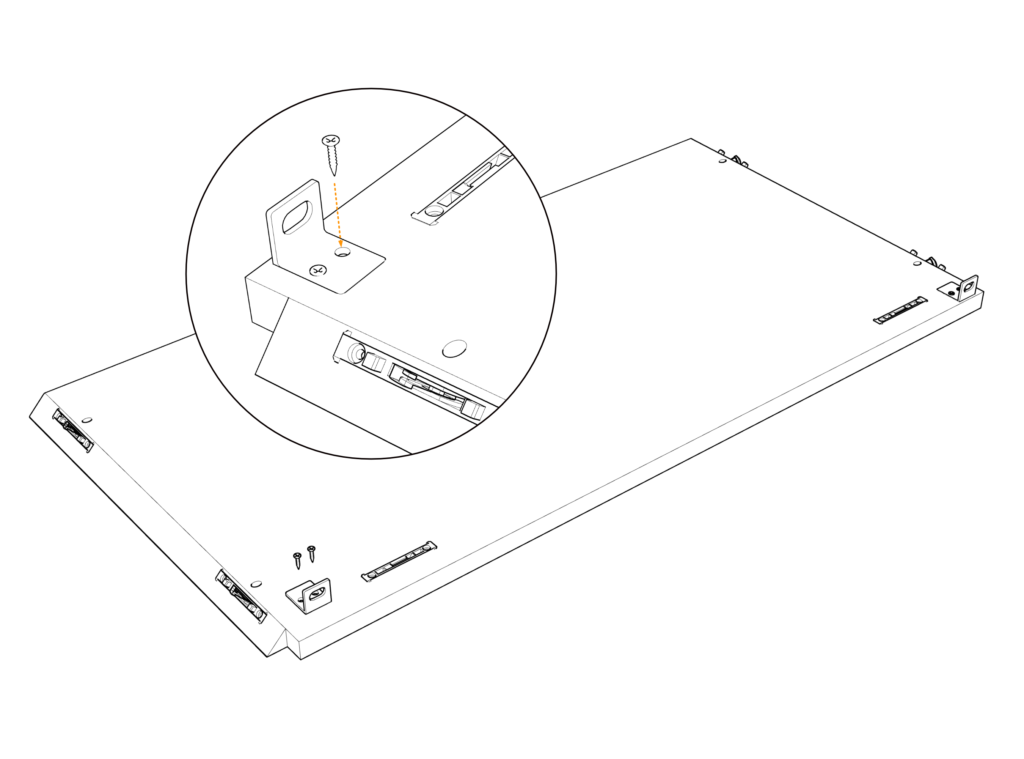
Step 2. Cross brace
Place the cross brace into the mating connectors but don’t tighten them yet.

Step 3. Side Panels
Align a side panel to the base, so the connectors mate; there is a small amount of adjustability, so make sure the front edge is flush, then using a 4mm hex wrench, tighten only the front-most panel connection.
Place the second side, tighten the front-most connector again, then tighten the back brace’s vertical connectors.

Step 4. Bottom Panel
Once everything is mating up nicely and the front corners are flush, tighten the remaining connection on the side panels and the back brace connectors with the cabinet top. Finally, place the bottom panel on and pull down the same way; now rotate the cabinet right side up.

Step 5. Cabinet Hanging
Using a pair of cabinet supports, insert them in the support rails opposite each other with the long flat side facing up. Slide the cabinet in place, resting on the brackets.


Doors Swing
Attach the door hinge clips with 5mm euro screws.

Attach cup hinges to the doors with the provided wood screws.

Step 3. Swing Doors
Attach the door by snapping the hinge onto the clips
Step 4. Door spacing
Using a screwdriver, turn the adjustment screws on the hinge and clip to align the door with even spacing. It helps to loosen the hinge clip on the cabinet side to get the entire adjustment range.

Doors Flop


Drawer
Step 1. Drawer face
You can lay a blanket or towel on a table to protect the panel, then place it face down.


